
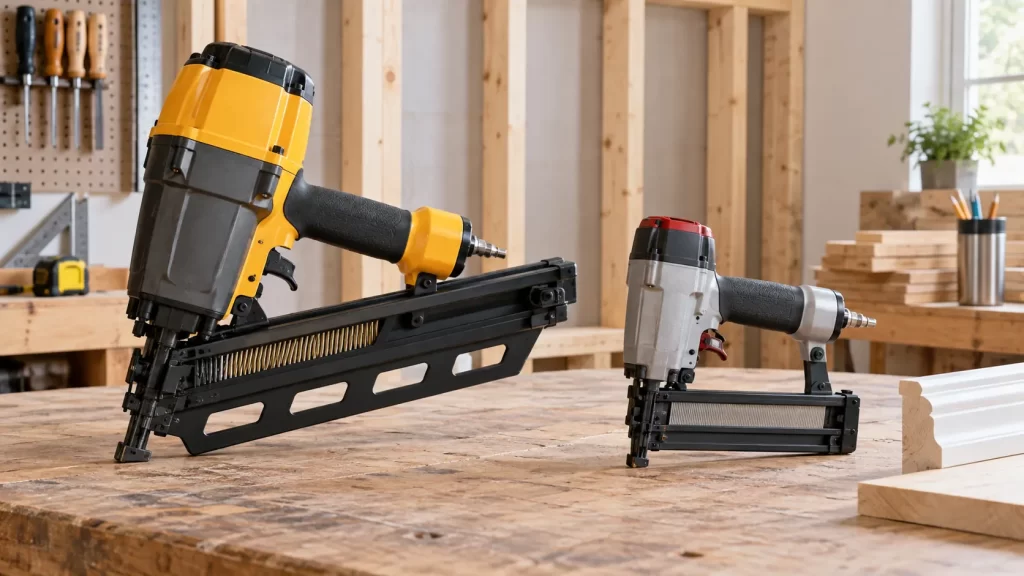
Quick answer: A framing nailer is for assembling heavy wood members when the fastener schedule and approved plans call for framing nails. An 18-gauge brad nailer is for holding thin trim, molding and light decorative pieces in position. The tools do not substitute for one another: a brad is too small to be a structural fastener, while a framing nail can split or badly mark a delicate piece of trim. Start with the joint you must make, not with the tool that happens to be in your garage.
This guide compares what the two nailers actually drive, the work each is suited to, how their fasteners and magazines differ, and how to use them without treating a powered fastener as a shortcut around good layout. It also separates general advice from model-specific numbers. A manufacturer’s permitted nail range, the building plan and local code always take precedence over a generic chart.
What is a framing nailer?
A framing nailer drives relatively large collated nails through structural lumber or sheathing in construction and remodeling. Typical jobs include assembling stud walls, attaching blocking, and fastening certain roof or floor components when the engineered fastening schedule permits nails from the selected tool. It is designed to place a substantial fastener quickly and repeatedly. It is not a universal replacement for a hammer, structural connector nails, screws or a specified fastening system. A connector or engineered joint may require a particular nail diameter, length, head and placement pattern that a general-purpose framing nailer does not provide.
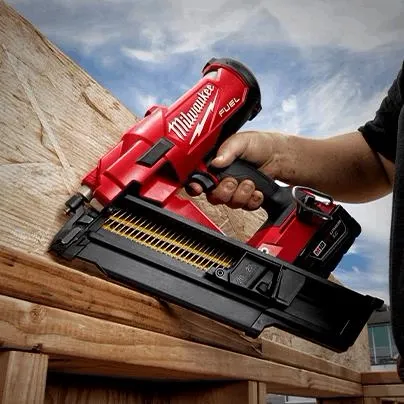
As a concrete example rather than a specification for every model, Milwaukee lists a 2-to-3½-inch nail range for its M18 FUEL 21-degree and 30-degree framing nailers. Their published nail-diameter ranges differ between those two versions. That illustrates why the magazine angle and accepted collation must be checked before buying a box of nails. See the manufacturer’s framing-nailer specifications, then verify the exact manual and fastener package for the model in your hand.
Framing nails have more length and a much larger shank than 18-gauge brads. That makes them suitable for higher-load wood connections when the entire connection is designed correctly. Holding power is not a single number printed on a nailer box: wood species, penetration into the receiving member, grain direction, shank type, head, edge distance and the load path all matter. Two nails driven in the wrong place can be weaker than one correctly specified fastener. The tool supplies the driving force; the plans determine whether the connection is sound.
What is an 18-gauge brad nailer?
A brad nailer drives thin, small-headed 18-gauge fasteners. Carpenters use it to attach decorative trim, small moldings, cabinet details and light pieces that need a discreet hole. The thin shank can reduce splitting in narrow stock, although it cannot eliminate it. The small head also leaves a hole that is easier to fill than the opening from a framing nail. A brad’s modest holding power is useful for positioning an already sound assembly, but it should not be mistaken for a structural connection.
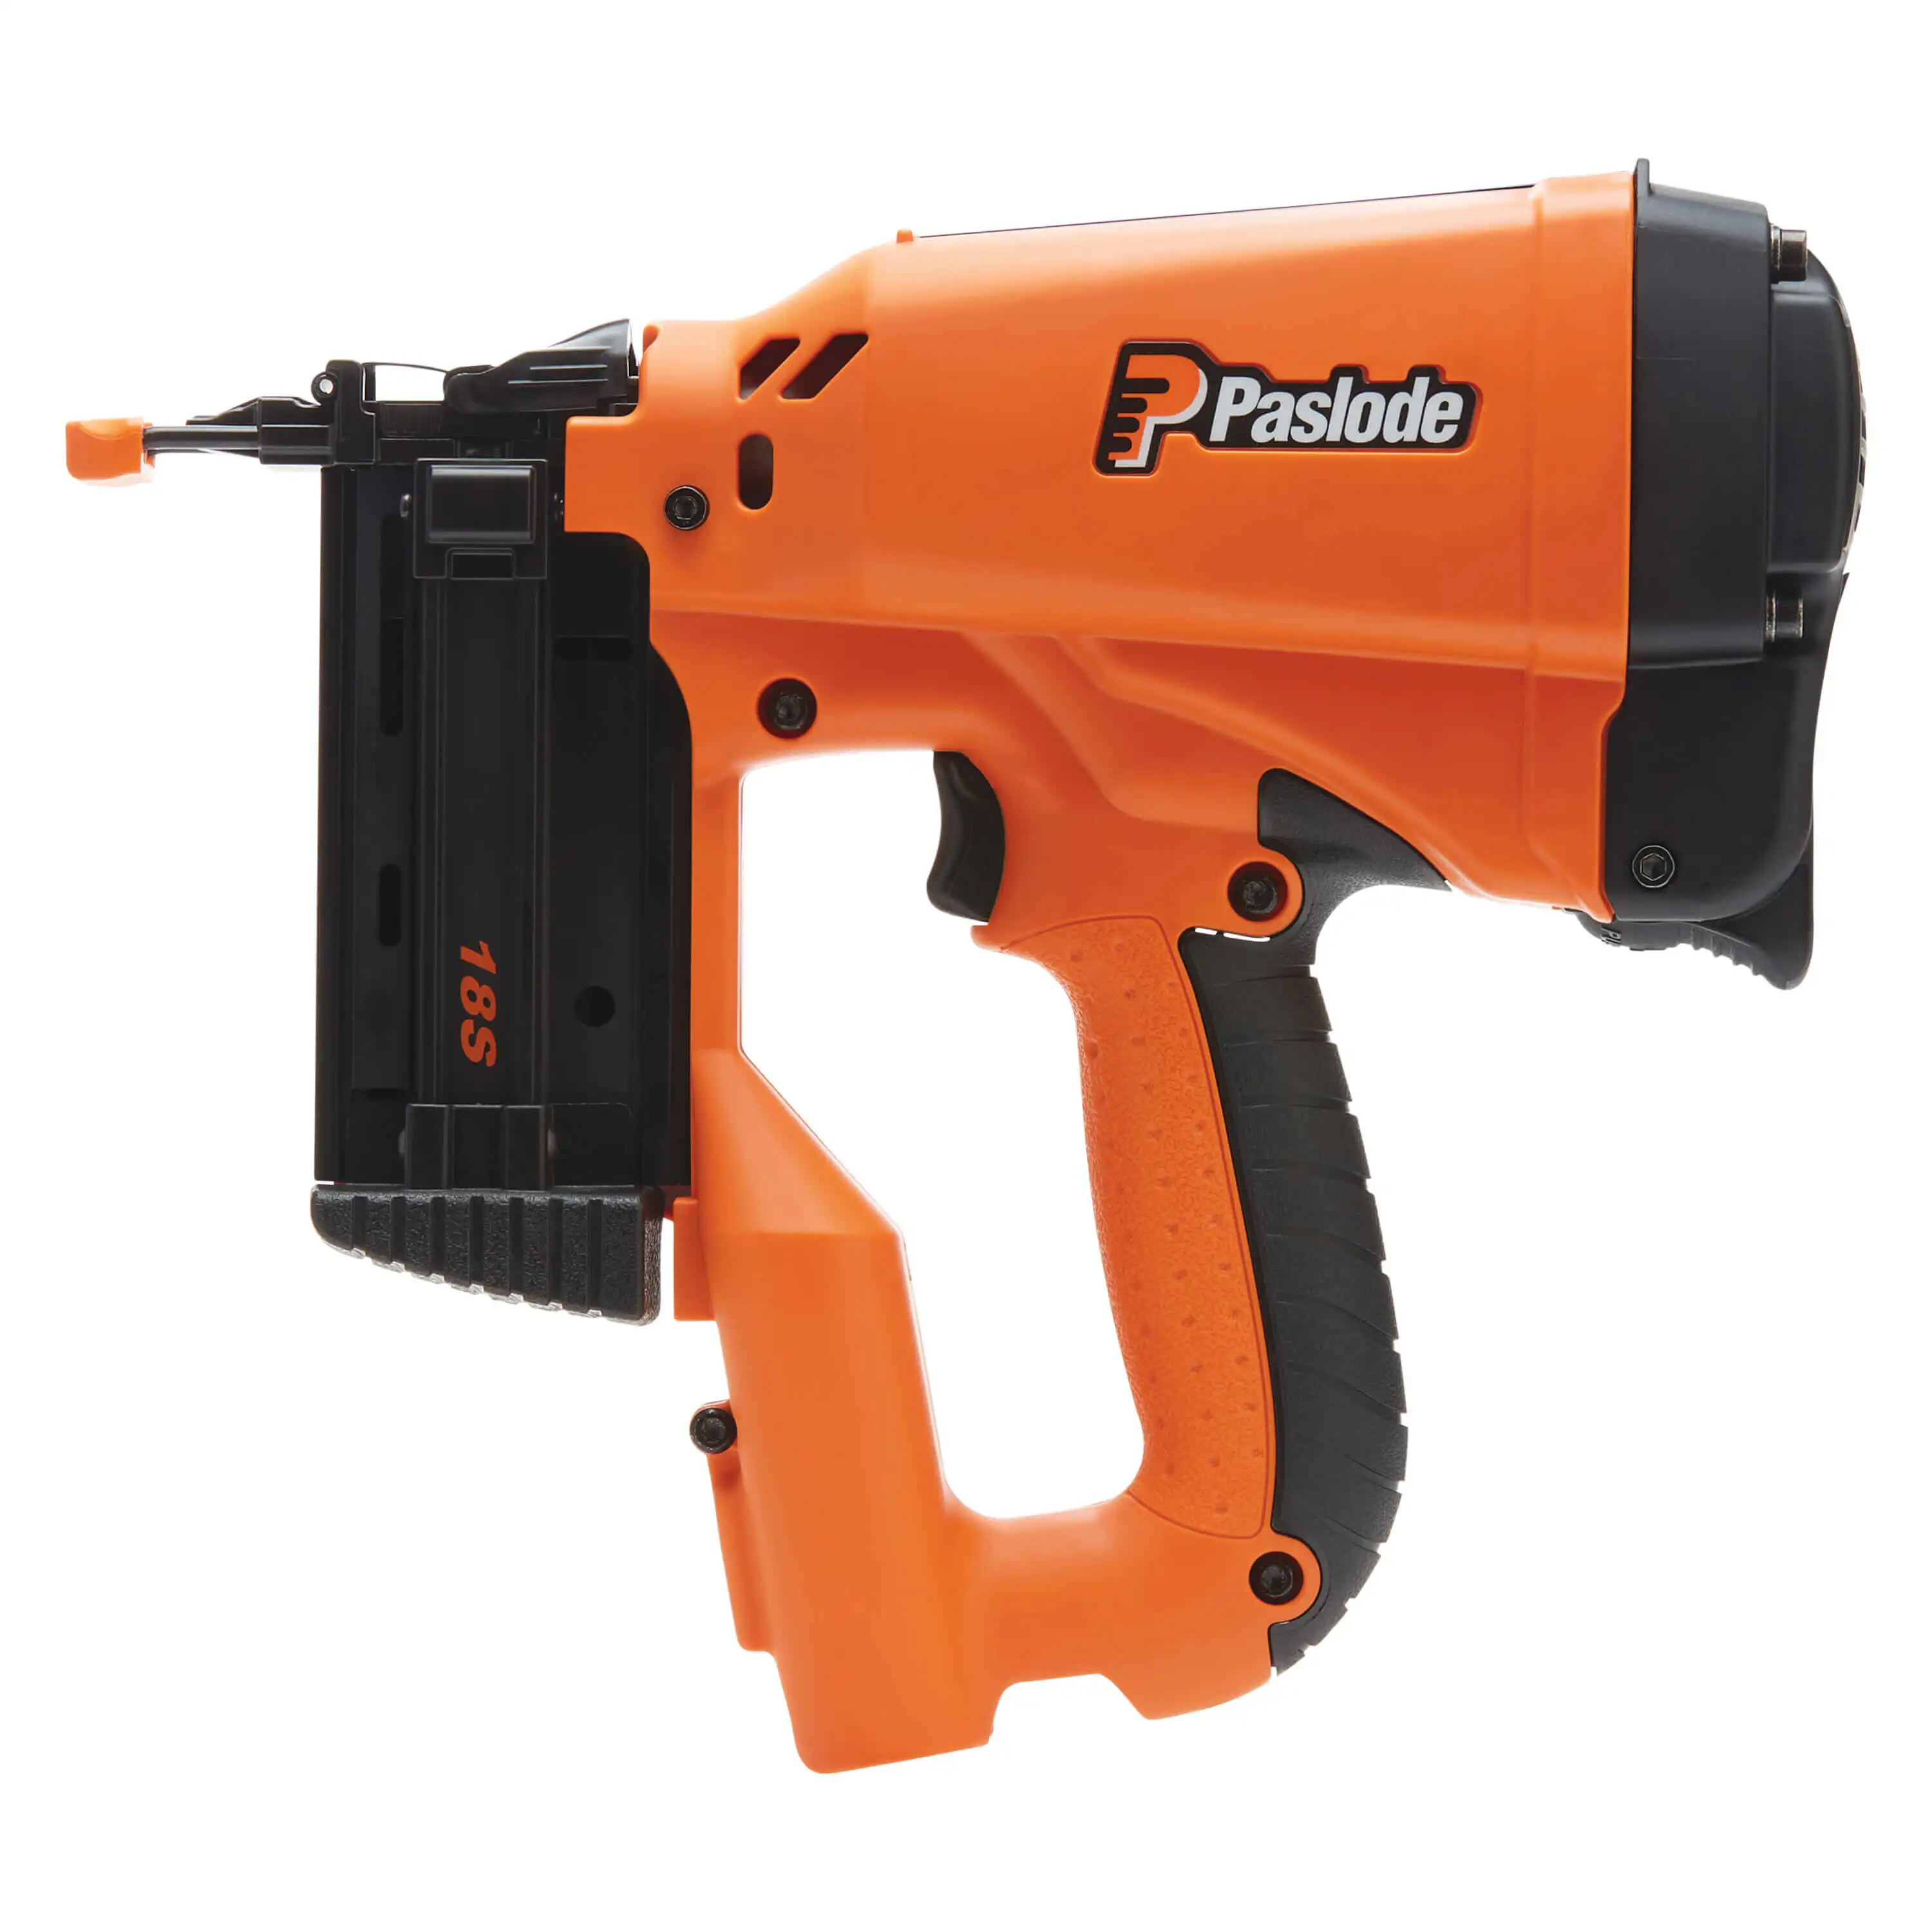
For a current example, Milwaukee describes its 18-gauge brad nailer as a finish-work tool with depth adjustment and jam access in its official product information. These are examples, not a promise that all brad nailers accept every fastener in that range. Check the tool label and manual for gauge, length, head and collation before loading anything.
Some finish assemblies combine brads with an appropriate adhesive. The brad may hold a small piece while adhesive cures, but glue works only if the surfaces, adhesive and clamping method suit the materials. It does not magically turn trim into a load-bearing member. Moisture, paint, dust and a poor-fitting joint can weaken an adhesive bond. Where trim must resist repeated impact or support an object, look for a fastening method specified for that load rather than assuming that extra brads solve the problem.
The core difference: job, fastener and finish
The simplest comparison has three parts. First, a framing nailer serves a structural or rough-construction workflow, while a brad nailer serves finish carpentry and light assembly. Second, the framing fastener is much larger; an 18-gauge brad is slender and small-headed. Third, the visible result differs: a framing nail is normally buried in work that will be covered, while a brad is chosen partly because its hole can disappear into a finished surface. The difference is not merely tool weight or motor power.
The word gauge can confuse new buyers. A higher gauge number means a thinner wire diameter in this context. An 18-gauge brad is thinner than a 16-gauge finish nail. Framing nails are usually described by a shank diameter and length rather than by treating “framing gauge” as one uniform value. Magazine angle, nail head style and collation are separate dimensions. An 18-gauge brad strip will not fit a framing-nailer magazine, and a 30-degree framing strip should not be forced into a tool designed for another angle.
If you are building a stud wall and later adding baseboard, you may use both tools on the same project. Use the framing nailer only for framing connections it is approved to make, then switch to a brad or another suitable finish nailer for the trim. That distinction keeps the visible finish cleaner and, more importantly, prevents a decorative fastener from being assigned structural work. In the next sections, each decision starts with material and connection requirements rather than a blanket rule that one tool is “better.”

Where the two tools belong in a real project
Imagine building a short interior partition. The studs and plates form the load-carrying skeleton, so the fastening decision belongs to the framing plan, not to the appearance of the finished wall. A framing nailer may be appropriate if the specified nail, placement, member size, and local rules permit it. An 18-gauge brad is not a substitute just because it leaves a discreet hole. The smaller fastener is designed to hold lightweight finish pieces, not to provide a structural connection between framing members. If the plans call for screws, connectors, or a particular nail schedule, follow those documents instead of treating any nail gun as interchangeable.
Now imagine the same wall after drywall is installed and painted. A narrow decorative molding needs to sit neatly against the wall while adhesive cures, or a light trim strip needs to stay positioned without a large visible hole. This is where an 18-gauge brad nailer can be useful. Its smaller nail is easier to conceal with a little filler, and the tool is easier to place in a tight finish-work area. The choice still depends on what the molding is attached to. A brad driven only into drywall can loosen; locating a sound backing member or following the trim manufacturer’s attachment instructions matters more than the tool name.
Door casing illustrates the boundary between the tools. Casing is finish material, so a brad nailer may help attach a light profile without splitting the visible face. A heavy casing or a piece with movement and gaps may require a different fastener, a finish nailer, adhesive, or a combination recommended for that assembly. A framing nailer is usually too aggressive for thin casing: it can crush the face, leave an oversized hole, or split a narrow edge. It is possible to adjust depth on many tools, but depth adjustment does not turn a thick framing nail into a fine finishing fastener.
For a subfloor or deck, neither label alone answers the question. Subfloors may have engineered fastening schedules that specify ring-shank nails, screws, adhesives, spacing, and edge distances. Deck boards have weather exposure and corrosion requirements. A framing nailer may be capable of driving a fastener that looks suitable, but the nail’s coating, head, and approval for that use must match the project specification. A brad is generally a poor choice for either job. Treat the assembly instructions and applicable code as the governing source, and use the tool only after identifying the correct fastener.
Cabinet face frames and decorative panels create another useful distinction. Small, well-fitted pieces may be temporarily held with brads while wood glue develops its bond. The brad can improve alignment, but the glue joint and design determine strength. A framing nail would usually be out of scale. Conversely, framing a rough workbench base or fastening substantial construction lumber can call for heavier fasteners, though bolts, screws, or joinery may be the better design. The strongest tool in the room is not automatically the most suitable one.
Fastener compatibility matters more than a marketing category
Before buying nails, read the tool’s exact model specification. Nailers accept a defined gauge or shank diameter, length range, collation style, and sometimes a particular angle or head type. A strip that looks similar can still jam or fail to feed correctly. Milwaukee’s published framing examples include separate 21-degree and 30-degree platforms, while its 18-gauge brad product is an entirely different fastener system. Those specifications are model examples, not universal rules for every brand. Never force a strip into a magazine or substitute a near match on the assumption that all framing nails, or all brads, are alike.
Nail length should be chosen from the assembly outward. Consider the thickness of the material being attached, the backing material, the required embedment, and what lies beyond the backing. A long nail that reaches a hidden cable or exits the far side of a board is not safer or stronger merely because it is long. A short nail that barely enters sound wood may not hold the piece. The manufacturer’s manual, construction plans, and local requirements can specify minimum penetration or a particular nail. If those sources conflict with a generic chart, use the more specific requirements and ask a qualified professional when the connection is consequential.
Head shape, shank texture, and coating also affect performance. A full-round-head framing nail, a clipped-head variant, a ring-shank nail, and a smooth-shank nail do not behave identically, and building rules may limit which is acceptable in a given connection. Corrosion-resistant coatings matter outdoors and around treated lumber; compatibility with the wood treatment and environment should be checked rather than guessed. Brad nails normally have small heads intended for inconspicuous finish work. The small hole is convenient for appearance but is not evidence of high withdrawal resistance. Match the whole fastener specification, not just its nominal length.
Think about the material, too. Thin or brittle trim can split when a nail is too thick, too close to an edge, or driven through a fragile grain direction. Reduce the risk by testing on an offcut of the same material, adjusting depth, and checking placement. A brad is often gentler than a framing nail, but it can still blow out of an edge or follow the grain unpredictably. Hard or dense wood may resist a brad or bend it. In those situations a pilot hole, a different fastener, or another fastening method may be wiser. Our guide to 118-degree and 135-degree drill bits explains one prerequisite when you decide that careful drilling is a better route than driving a nail.
Power source: pneumatic, cordless battery, and fuel
Pneumatic nailers use compressed air, so the tool is usually connected to a hose and compressor. The setup can be productive for repeated work in a shop or on a large site, particularly when several compatible air tools share the compressor. The trade-offs include hose management, compressor noise, power for the compressor, and attention to pressure settings and maintenance. Verify that the compressor can meet the tool’s air-demand specification; simply owning a compressor does not establish compatibility. Disconnect the air line before clearing a jam or servicing the tool according to the manual.
Cordless battery nailers remove the hose and can be convenient for scattered tasks, small repairs, or moving room to room. Their weight, cycle rate, magazine capacity, runtime, and balance vary by model. A battery platform can be economical if you already own compatible packs, but compare the actual kit contents before assuming a bare tool includes a charger or battery. Some cordless systems also use a fuel cell or gas cartridge; that creates a consumable cost and storage considerations. None of these power sources changes the intended fastener class. A battery framing nailer remains a framing nailer, and a battery brad nailer remains an 18-gauge finish tool.
Choose the power system around the work pattern. For a day of continuous framing, output, weight, access to power, and a reliable fastener supply can dominate. For installing a few pieces of trim upstairs, setup time and maneuverability may dominate. If you rent a tool for one project, include the correct nails and any required battery, charger, compressor, hose, or fuel in the rental plan. A low advertised tool price can become misleading if it omits essentials. Compare the complete working system and the likely number of future projects, not just two sticker prices.
Safe setup and operation
Both tools can drive a nail through wood and into a hand, foot, or hidden service. The smaller hole left by a brad does not make an accidental strike harmless. Read the exact manufacturer’s manual, wear eye protection, keep bystanders clear, and check the work for electrical cables, plumbing, and other hidden hazards before fastening. Secure loose work rather than holding a small piece close to the nose with your hand. Keep your non-trigger hand out of the potential nail path, including the far side and edges of the material. Nails can deflect, pass through a thin board, or emerge where you did not expect.
Trigger design deserves deliberate attention. CDC/NIOSH’s nail-gun safety guidance distinguishes sequential triggers, which require the nose and trigger actions in a sequence, from contact triggers that can fire during bump operation. Its safety research associates contact-trigger use with greater injury risk than sequential triggering. For occasional or precise work, a full sequential trigger is the sensible default where the tool offers it. Do not tape a safety contact, bypass a guard, or carry a connected nailer with a finger on the trigger. Set the tool down safely and disconnect its power source before clearing a jam, inspecting the nose, or changing a setup as the manual directs.
Start a job with a test in scrap that matches the actual stock and backing. Confirm the nail exits the nose in the intended direction, seats to an appropriate depth, and does not split or break through the surface. If the head stands proud, first check whether the work is firmly supported, the fastener is correct, and the tool’s depth or power setting is appropriate. If the head sinks too deeply or damages the face, reduce the setting or change the fastening method. Repeated misfires or jams are a signal to stop and inspect according to the manual, not to keep pulling the trigger until the tool behaves.
Position also matters. Keep the tool’s nose square to the work when the application requires it, maintain stable footing, and avoid firing toward yourself, another worker, or a surface that cannot safely contain the nail. Extra caution is needed at edges and corners, where a nail can follow grain or exit the side. When attaching one piece to another, know how thick both are and what supports them. A thin board held in the air by hand is a poor test fixture. If you are unfamiliar with a fastener schedule or are working on a structural or safety-critical connection, pause for the plans or a qualified installer rather than improvising.
How to decide without buying the wrong tool
First, name the piece you are fastening and its job. Is it part of a structural frame, a specified construction assembly, a cosmetic trim piece, or a temporary positioning aid while adhesive cures? That question often resolves the framing-versus-brad choice faster than a feature comparison. Second, identify the required fastener from the plans, product instructions, or applicable standards. Third, check whether the tool accepts that exact fastener and whether you can use it safely in the available space. If any of those steps remains unclear, do not assume that a more powerful nailer is safer or more versatile.
For studs and plates in a specified framing assembly, a framing nailer may be the right powered tool if its approved nails and placement meet the plan. For lightweight baseboard, small molding, or decorative trim, an 18-gauge brad nailer may give a neater result if the substrate and attachment method are suitable. For heavy trim, exterior work, cabinets, and specialty materials, the answer may be a finish nailer, screw, adhesive, hand-driven fastener, or engineered connector instead of either tool in this comparison. The point is not to force every project into a two-tool decision; it is to recognize when the comparison itself is the wrong question.
A quick trial can reveal issues that specification sheets cannot. On spare material, compare the visible hole, splitting, holding of the sample under gentle hand pressure, and the effort needed to fill and finish the mark. Do not use a hand-pressure test to certify structural strength; it is only a check for finish quality and obvious installation problems. If the sample needs a large filler patch or leaves a raised fiber ring, reassess nail size and depth. If the strip peels away, reassess backing, embedment, adhesive, and fastener choice. Keep the test result and the final installation method consistent.
Common mistakes and misconceptions
One mistake is treating gauge as a direct measure of every kind of strength. Gauge describes wire diameter, and an 18-gauge brad is thinner than a typical framing nail, but connection performance also depends on head, shank, penetration, wood, spacing, and load direction. A bigger nail cannot rescue an incorrect pattern or damaged member. A smaller nail can perform well for a light finish task without becoming structural. Compare complete assemblies rather than reducing every decision to one number printed on the box.
Another mistake is assuming that a framing nailer can do finish work merely by turning down its depth control. Depth controls where the head lands; they do not shrink the fastener or the tool nose. On thin trim, the fastener may split the wood, the nose may mar the finish, and the hole may be conspicuous. The reverse error is using a brad because it is quiet or convenient when the connection calls for a specified construction nail. Convenience does not change the design requirement. If only one tool fits your budget, rent the other for the project rather than compromising an important connection.
It is also easy to conflate a framing nailer with a powder-actuated fastening tool. These are different tool categories with different power sources, training needs, fasteners, and applications. The ordinary framing nailers compared here are designed to drive compatible framing nails, usually through pneumatic or cordless mechanisms. Do not use a framing-nailer buying guide as permission to fasten into concrete, masonry, or steel. For those substrates, use an appropriate engineered fastening method and follow the relevant manufacturer’s instructions and site rules.
Finally, do not assume that a nail head you cannot see means the work is finished. A neat brad installation still needs secure backing, correctly filled holes when appearance matters, and a check that the trim does not spring away. A framing connection may look complete while hiding a missed member, an overdriven head, an incorrect fastener, or too few nails. Inspect the actual connection. If you are preparing lumber for a fastening job, our comparison of Hackzall and Sawzall cutting tools can help you choose a practical cutting tool before assembly; good cuts and good fastening are complementary, not interchangeable.
Maintenance, costs, and final recommendation
Care for the tool that you choose. Follow its manual for cleaning, lubrication where required, battery storage, compressor water drainage where relevant, and safe jam clearing. Keep the correct nails dry and identifiable in their packaging. Before each session, check the nose, trigger, magazine, and power connection for damage or unusual behavior. Do not continue with a tool that double-fires unexpectedly or has a defective safety contact. Repairs and replacement parts should match the manufacturer’s instructions rather than improvised fixes.
When comparing ownership costs, include more than the tool body. A pneumatic setup may require a compressor, hose, fittings, and an appropriate supply of compressed air. A cordless setup may require batteries, charging equipment, and sometimes fuel cells. Fasteners, protective equipment, maintenance, and the occasional rental all contribute. For one small trim project, paying for an entire framing platform is unlikely to be efficient. For regular framing work, choosing the correct platform and supplies can save time, but only if the job actually calls for driven framing nails. Do not use stale price lists as a substitute for current local quotes.
The practical conclusion is simple: use a framing nailer for suitable construction framing connections that specify compatible framing nails, and an 18-gauge brad nailer for suitable lightweight finish work where a small visible mark matters. Check the project’s fastening specification first, the tool manual second, and a representative offcut before working on the finished surface. If the fastener, substrate, or required connection is uncertain, choose a verified method rather than the nailer that happens to be available. That sequence protects both the quality of the result and the people doing the work.
Worked choice: one room, several fastening decisions
Suppose you are renovating a room and the shopping list says only “nail gun.” The work actually contains several distinct joints. New stud blocking inside a wall is a construction connection; consult the plan for its fastener and pattern, then use a suitable framing nailer only if the specified method allows it. A slender picture-rail molding installed after the wall is finished is a finish connection; an 18-gauge brad may make sense after you confirm sound backing and any adhesive requirements. A loose cabinet hinge is neither problem: it needs the right screw and sound screw hole, not a driven nail. Treating all three as one purchase decision would overlook how differently the joints are loaded and repaired.
Now consider removal or future adjustment. A small brad hole in painted trim is usually easy to fill, but the holding power may be limited if the backing is weak. A framing nail makes a more substantial connection and a more disruptive removal; that is appropriate only when the assembly requires it. Screws can be preferable for some serviceable parts because they can be backed out, yet they also require correct sizing and installation. The best choice balances the connection’s duty, finish quality, access, manufacturer directions, and the consequences of failure. A tool comparison is useful only after those questions are answered.