AQA GCSE Art and Design (Photography) past papers are best understood as examples of externally set assignments, not conventional written exam papers with model essays and a fixed answer key. The current qualification is code 8206. Students develop a portfolio for Component 1 and respond to a starting point from AQA’s assignment for Component 2. Both components are non-exam assessments, marked by the school and moderated by AQA. This guide explains where to find official material, what an older assignment can and cannot teach you, and how to turn a starting point into a thoughtful photographic project.
If you came here looking for a downloadable paper, begin with AQA’s official assessment resources for GCSE Art and Design 8206. Filter for Photography and the document type you need, and check the year and component before opening a file. AQA’s Photography specimen externally set assignment is a useful illustration of the format, but it is a historical specimen, not a prediction of your live assignment. Your teacher or exams officer should confirm which specification and assignment apply to your cohort.
What counts as a Photography “past paper”?
In many GCSE subjects, a past paper is a sequence of questions answered under timed conditions and checked against a mark scheme. Photography works differently. AQA publishes an externally set assignment for Component 2 containing starting points. A candidate chooses one and makes a personal response supported by research, experiments, development and a final outcome. There is no single correct photograph to reproduce. A paper can show how a starting point is framed and what kind of visual investigation it invites; it cannot supply a universal answer.
That distinction changes how you should revise. Memorising a specimen theme or copying an attractive image will not demonstrate a personal line of enquiry. A stronger use of a past assignment is to practise interpretation: list possible meanings of a starting point, identify visual sources, plan several shoots, test different techniques and explain why one direction develops more convincingly than another. Then compare your process with the assessment objectives in the current specification. The marks reward the quality of an evidenced creative journey, not merely the polish of one final print.
Some online lists mix up examiner reports, question papers, general Art and Design documents and Photography-specific assignments. Check the title printed on the document itself. A June 2022 report about the wider Art and Design qualification, for example, is not a Photography question paper. An old specimen may still be useful for practice, but use the current AQA specification at a glance for the live structure. Do not assume that a third-party file table is complete or up to date.
The 8206 assessment structure in plain English
Component 1 is the portfolio. It contributes 60% of the GCSE and is worth 96 raw marks. It has no fixed time limit, although your school sets its own working schedule. The portfolio shows sustained development, experimentation and a personal response through photographic work. You should be able to trace the decisions behind the outcome, including ideas you abandoned for good reasons. AQA sets the assessment framework, while the centre sets and marks the work and AQA moderates those marks.
Component 2 is the externally set assignment. It contributes 40% and is also worth 96 raw marks. AQA provides seven starting points; you choose one. There is a preparatory period followed by ten hours of supervised, unaided time for your final response. The assignment becomes available from 2 January in the assessment year. Your school will tell you exactly when you receive the paper, when preparation ends and how its supervised sessions are arranged. Do not treat the ten hours as the whole project: the ideas, shoots, tests and selection developed beforehand are central to a convincing response.
Once the supervised period starts, you cannot continue editing your preparatory studies. The first two hours of supervised time must be consecutive. AQA’s published rules also restrict general internet access during the supervised period; your centre manages the precise working conditions and permitted resources. Plan your final production so that it remains workable if you cannot browse for inspiration, retrieve cloud files or do another location shoot at the last minute. Save and organise allowed working files as your teacher instructs, and ask about any equipment or digital workflow you are unsure of before the timed sessions.
The raw marks do not translate directly into a 50:50 grade weighting. AQA scales Component 1 by three and Component 2 by two, giving 288 and 192 scaled marks respectively, for 480 in total. This is why a large portfolio and a shorter externally set project can each be marked out of 96 yet contribute 60% and 40%. The four assessment objectives each carry 25% across the qualification. Read the official scheme of assessment for the wording and mark bands rather than relying on an invented “photography mark scheme” for a particular image.
How to find and use AQA’s official resources
Start at the AQA 8206 assessment-resources page rather than a file shared without its context. Choose Photography where the filters allow it, then distinguish an externally set assignment from a specimen, examiner report, assessment material or support document. Note its year and component in your project log. If a direct PDF link no longer opens, return to the resource hub; AQA may reorganise its files. Keep the current specification open beside older material so you do not mistake a historical instruction for a rule that applies now.
For a first practice session, read an older assignment without looking at online student outcomes. Pick one starting point and write three genuinely different possible interpretations. A prompt involving “traces,” for instance, might become weathered surfaces in local architecture, marks left by moving light, or objects that reveal daily routines. For each direction, write what you could photograph yourself, what permission or access you would need, and which technical choices would make the idea visible. You have now used the paper to generate a project plan rather than to imitate somebody else’s finished work.
Next, spend a short, bounded period on research. Examine work by photographers or other relevant artists, but do not collect names merely to decorate a page. For each source, identify one useful visual decision such as framing, sequence, lighting, colour, scale or presentation. Try a small photographic test inspired by the method, not a copy of the image. Record what happened and how your result differs from the reference. Include attribution and follow your centre’s rules on sources and authenticity. The aim is to show influence and independent judgement together.
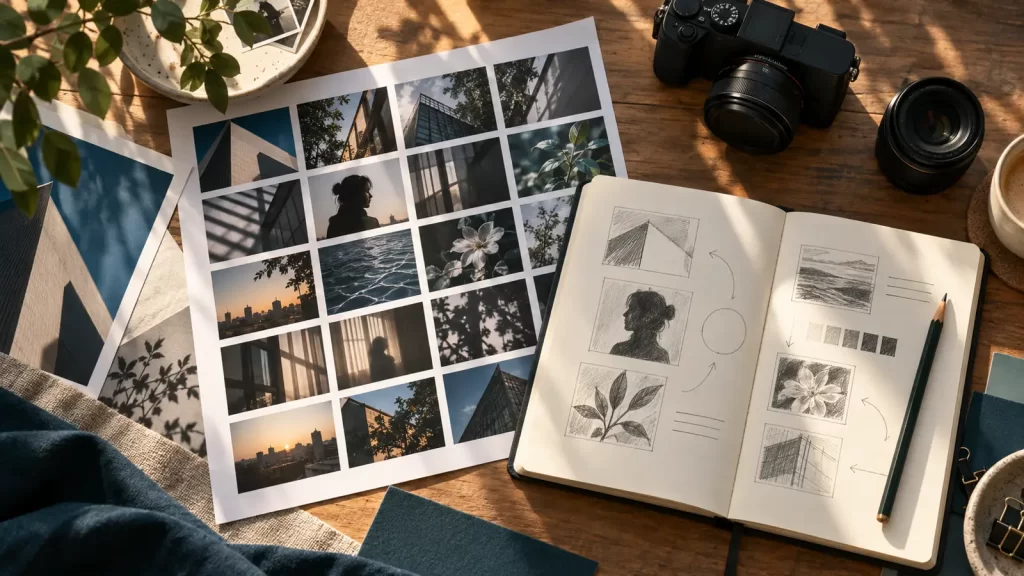
Finally, make a miniature response: a contact sheet, a selected edit, brief annotations and a possible final sequence. Ask whether another viewer could follow the movement from prompt to research, experiment and outcome without needing you to narrate every step. Then get feedback from your teacher. The exercise can reveal a weak question, an inaccessible subject, a technique that needs practice or an edit that hides your strongest pictures. These insights are more valuable than repeatedly reading the same specimen.
The four assessment objectives as a photography workflow
AO1: develop ideas through investigation. Begin with a visual question that can change as you learn. “I like portraits” is a category, not yet an enquiry. “How can window light and distance from the camera communicate isolation in portraits of familiar spaces?” gives you something to test. Investigate photographers, places, objects, stories or visual traditions that matter to that question. Explain what you noticed, why it matters and how it changes your next shoot. A brief, precise comparison between two relevant sources is often more useful than a long biography detached from your own work.
AO2: refine through experimenting. Show alternatives and evaluate them. You might photograph the same subject at dawn and under a desk lamp, vary viewpoint from eye level to ground level, change focal length or use a longer exposure. Display enough of the trial set to make the choice visible. Then explain why an experiment advanced, complicated or weakened your idea. “I used a slow shutter speed” describes a setting; “the blur made the commuter’s movement legible but obscured the sign that anchored the story, so I shortened the exposure” is refinement.
AO3: record observations and insights. Your photographs are records, but so are contact sheets, notes on location, sketches of a lighting setup, test prints and annotations about what you saw. Record selectively and honestly. Date or sequence key shoots, label technical settings when they explain a decision, and say what you learned. A screenshot of a camera display without analysis is weak evidence. A short note connecting a change in aperture to the viewer’s attention can be strong evidence. Recording should support the enquiry, not turn the portfolio into an equipment manual.
AO4: present a personal and meaningful response. Choose the images, order and presentation that best resolve your question. A final outcome might be a carefully edited series, a book, a set of prints, an installation or another form appropriate to the brief and your centre’s facilities. “Personal” does not require disclosure of private experiences. It means that the choices are recognisably yours and appropriate to the idea. Revisit your starting question before finalising: do the images and their sequence actually communicate what you discovered, or are they simply the most technically perfect frames?
These objectives are not four boxes to fill once and forget. A later shoot may send you back to research; a printing test may reveal that a compositional choice no longer works. The most persuasive portfolios make those loops visible. They also show proportion: enough documentation to explain decisions, enough original images to demonstrate practice, and enough reflection to make the direction intelligible. AQA assigns each objective a quarter of the overall assessment, so a beautiful endpoint cannot fully compensate for absent development, and a detailed diary cannot substitute for an effective visual response.
What Photography can include
AQA defines Photography broadly, including film and digital approaches and static or moving image. Its subject-content page identifies possibilities such as portraiture, location and studio photography, documentary, photojournalism, fashion, experimental imagery, installation and moving image. You do not need to use every area. Choose a form that lets you pursue your idea deeply and within the equipment, access, safety and time available to you. Check your centre’s facilities before committing to specialist processes such as darkroom printing or a moving-image installation.
The technical content can include viewpoint, lighting, aperture, depth of field, shutter speed, movement, editing and darkroom or digital processes. Treat these as expressive tools, not a checklist of tricks. A shallow depth of field may separate a subject from a busy background; a deeper focus may be better when the surrounding environment is part of the story. High contrast can make a silhouette striking but remove detail that would reveal a subject’s expression. If you need a refresher on visual organisation, Sly Academy’s composition guide explains how placement, balance and visual hierarchy shape an image.
Consider an example project about “thresholds.” One student might document doorways in a town, using repeated central framing to compare public and private spaces. Another might make portraits at windows, changing the balance of interior and exterior light. A third could experiment with shadows crossing floors. All three respond to the same word, but their evidence, technical tests and final outcomes would differ. The starting point should open a question, not lock every candidate into the same subject or camera effect.
Technical fluency grows through controlled comparisons. If motion is important, keep viewpoint and subject roughly constant while changing exposure duration, then compare which frame best communicates pace or uncertainty. If colour is important, compare a consistent set in colour and monochrome, and explain what information disappears with colour. If the work will be printed, test at the actual size: a frame that looks crisp on a phone may feel weak as a large print. Sly Academy’s guide to contrast offers a useful vocabulary for discussing tonal separation and emphasis.
Building a portfolio that shows thinking
Begin Component 1 with a manageable theme and an open question. Write a one-paragraph intention that names a subject, a visual approach and an uncertainty worth exploring. For example: “I want to investigate how ordinary bus stops look different at the beginning and end of the school day, using changing light and the presence or absence of people.” This is specific enough for a first shoot but flexible enough to develop. Avoid promising a final format before you know what the images reveal.
Make a first contact sheet that includes imperfect frames. This is not evidence of failure; it shows the range from which decisions emerged. Circle or annotate three candidates and explain why each could work. Perhaps one frame communicates the location clearly, another has stronger light, and a third has an unexpected reflection. Identify the issue you will test in the next shoot. If all your selected images are near-identical, ask whether the series is deliberate repetition or whether you have stopped investigating.
Use research as a conversation with your work. Suppose a photographer’s series uses repeated viewpoints across different locations. Your response might test repeated framing at three local sites, then reject the strategy because the backgrounds become too similar. That rejection still demonstrates learning if you explain it and move forward. Keep source details alongside your notes so that you can attribute work accurately. Do not paste a gallery of images with generic comments such as “I like the colours”; state which decision you will test and how your own photographs answer it.
Experiment with one variable at a time when you need to understand cause and effect, then combine variables once you have a direction. A lighting test might compare window side-light, diffused light and backlighting. A sequence test might compare chronological order, tonal progression and a deliberately unresolved ending. A print test might compare matt and glossy surfaces where your centre permits. Label the versions, show a small selection of outcomes and explain what each test did to the meaning of the work. This makes refinement visible without flooding the portfolio with every frame you ever captured.
Review the project at intervals. Lay out the strongest images beside the original question and ask what still needs evidence. Do you need a wider shot to establish context? A close detail to vary rhythm? A picture that complicates rather than repeats the idea? Is a certain location impossible to revisit safely? Revise the plan accordingly. Seek teacher feedback on the clarity of your line of enquiry and the evidence for the objectives, not just a verdict on which image looks nicest. Your teacher can clarify centre-specific submission formats and permitted processes.
When preparing a final outcome, edit ruthlessly but keep enough developmental evidence to show why the edit happened. A coherent six-image series can be more convincing than twenty unrelated “best shots.” Consider the first image’s invitation, the movement between images and the last image’s effect. If displaying prints, think about scale, spacing, paper and viewing distance. If presenting moving image, test sound and playback within centre rules. Document the final decision and a concise evaluation: what does the work communicate, where is it most successful, and what would you change if you had another shoot?
A worked practice response to an older starting point
Imagine an older assignment invites investigation of “patterns.” A rushed response might photograph a tiled floor, apply a filter and present the result. A stronger practice response starts by asking which patterns carry meaning. One possibility is repetition in daily travel: rows of windows, shadows from railings, the spacing between waiting passengers. The student could photograph the same route at different times and investigate how repeated structures frame changing human activity. This remains a hypothetical practice exercise; it is not an AQA prompt prediction or a template to submit.
For AO1, the student researches a relevant photographer’s approach to seriality and one visual source concerned with architectural rhythm. They note how consistent viewpoint creates a comparison across images. For AO2, they make three contact sheets: wide-angle views from the pavement, tighter crops of shadows, and frames that include people only as silhouettes. They find that the shadow studies look elegant but lose the everyday journey that interested them. For AO3, they record the route, time of day and exposure choices, alongside a diagram of where the camera was placed.
For AO4, the student chooses a short sequence that begins with a nearly empty platform and ends with the same geometry partly obscured by movement. The two locations are clearly related, and the difference in human presence carries the idea. Their evaluation notes that some mid-sequence frames repeat the same point and are omitted. Notice that no step relies on a single “correct” image. The quality lies in a testable visual question, original observations, meaningful selection and an outcome that makes those choices legible.
You can adapt this rehearsal method to another historical starting point without copying its images. Set a two-hour limit: thirty minutes for interpretation and source selection, forty-five minutes for a nearby shoot or use of your own previously captured test images where permitted, thirty minutes for selection, and fifteen minutes for notes on the next experiment. Do not mistake this short exercise for the real Component 2 timetable. Its purpose is to reveal whether you can move from a prompt to a defensible photographic decision. Repeat it with a second, very different interpretation if your first idea is too literal.
Preparing for the externally set assignment
When the live assignment is issued, read all seven starting points before choosing. Identify which one offers a genuine question you can pursue with your resources and access. Write two or three interpretations of your preferred choice and one alternative choice. The alternative is useful: if you cannot realistically photograph your first idea, you can change course early. Discuss your interpretation with your teacher within the rules of the course. Do not wait until the supervised hours to discover that an essential location, subject or piece of equipment is unavailable.
Use the preparatory period to collect first-hand material. Plan shoots that can be carried out safely and ethically, with permission where required. Make contact sheets and annotate selection. Research relevant practitioners, then test techniques in your own work. Keep a record of what you rejected and why. Prepare any reference images, sketches, digital files or prints according to the exact instructions your centre gives you. AQA’s non-exam assessment administration guidance covers matters such as supervision and authenticity; your teacher applies those rules to your school’s setup.
Before supervised time begins, make a production plan with a primary route and a fallback. Decide which images are likely to be included, what editing is still necessary, how they will be sequenced and what final form is realistic in ten hours. Check file formats, storage, backups, print access and any software requirements in advance. If you use film or a specialist process, be especially clear about what is permitted and feasible in the scheduled sessions. Plan for a technical failure: a missing font, a corrupted file or a printer delay should not make the entire response impossible.
During the supervised period, focus on resolving the work rather than starting a new research journey. Use the preparation you have already documented, make deliberate final choices and leave time to review the result. A sequence may need one less image; a print may need a different crop; an installation may need a clearer viewing order. Follow your centre’s conditions and do not assume ordinary web browsing is allowed. If a rule is uncertain, ask the supervising staff before you act. The objective is a personal, meaningful outcome connected to the investigation, not a frantic attempt to include every test.
Afterward, compare the final response with your initial intention. Where did the idea become more precise? Which experiment genuinely changed the outcome? What does a viewer understand without your verbal explanation? These questions help you evaluate your work fairly, and they are useful when you return to Component 1 or move on to advanced study. If you are exploring the next qualification, the site’s AQA A-level Photography resource page can orient you to its assignment materials, but do not mix the A-level assessment rules with GCSE 8206.
Ethics, originality and practical constraints
Photography often involves people, property and digital manipulation, so plan how to work responsibly. Ask for permission where appropriate, especially for a directed portrait or a private location. Follow school safeguarding rules; do not photograph someone who has not agreed to be involved in a way your school prohibits. Consider whether a documentary image could misrepresent a person or situation when taken out of context. A visually impressive project is not worth creating a safety or privacy problem for you or your subject.
Keep a clear distinction between work you made and material you found. Research images should be attributed; your own shoots should be identifiable as yours. If you combine or heavily edit images, explain the process and why it serves the idea. Authenticity is not the same as refusing all editing: cropping, colour work and compositing can be legitimate artistic decisions when permitted and documented. The problem is presenting a borrowed image, an undisclosed generated image or somebody else’s creative solution as your own. Check your centre’s current policy on AI tools and any other emerging technique before using them in assessed work.
Choose a project scaled to your available resources. A phone camera can support serious work if you control light, viewpoint, timing and selection. A costly lens does not create a line of enquiry. If your subject requires travel, access to vulnerable people or repeated night shoots, consider a safer local alternative that explores the same visual idea. Build redundancy into important shoots and keep organised copies of original files. When a process depends on an external lab, borrowed equipment or a school printer, confirm turnaround times well before the deadline.
Annotate with purpose. A useful note names a specific visual choice, its effect and the next decision. “The low viewpoint makes the doorway dominate; I will test a wider frame to show the person’s scale” is clearer than “I chose this because it looks good.” Keep language accessible and avoid a page of theory that never reaches the images. If you cannot explain why a particular photograph belongs in the project, it may be a beautiful outtake rather than part of the final series.
What changes for the 2027 assessment?
AQA announced a change for first assessment in summer 2027: Component 1 now requires a minimum of one sustained project, rather than the former requirement for a sustained project plus further work. This does not mean every student should make the smallest possible portfolio. Further work can still be submitted and assessed, and the expectations for breadth, depth and evidence against the assessment objectives remain important. The Component 1 and Component 2 weightings and the four assessment objectives do not change because of this update. Read AQA’s 2027 specification update and ask your teacher which version applies to your cohort.
This matters when studying older examples. A past portfolio or teacher-made checklist may contain a requirement that was accurate for an earlier cohort. It may also show more projects than the current minimum. Neither fact makes the example useless: it can still teach sequencing, annotation and visual development. But it should not replace the live specification. In particular, avoid adding a second superficial project merely because an old checklist says “further work,” and avoid assuming a single thin project will automatically satisfy all four objectives.
Calendar dates need the same care. AQA releases the externally set assignment from 2 January, but schools control when students receive it and set their own internal milestones. A published awarding-body deadline for centre administration is not necessarily your personal hand-in date. Put your teacher’s deadlines in your own plan and finish key shoots early enough to allow editing, printing and any permitted reshoots. The official assessment-resources page and specification should be checked again close to your assessment year, because document lists and administrative guidance can change.
A practical self-check before you submit
First, can you state the visual question behind the work in one or two sentences? If you can only name a broad topic, look back at your contact sheets and identify the particular contrast, relationship or uncertainty that emerged. Second, does the portfolio show original investigation rather than only a mood board? Your sources should connect to your own experiments. Third, can a viewer see at least one meaningful refinement, such as a changed lighting strategy, a revised edit or a different presentation choice, supported by evidence?
Fourth, are your strongest photographs selected for their contribution to the idea rather than simply for sharpness or popularity? Fifth, is the record clear enough to show how decisions happened without burying the outcome in repetitive screenshots? Sixth, have you checked attribution, permissions, file backups and your centre’s submission format? Seventh, for Component 2, are you prepared to work under the actual supervised conditions, with materials and digital files organised as your teacher requires?
If one answer is weak, make a targeted improvement. A missing context shot may need a short reshoot; a weak explanation may need three precise sentences, not another page of decorative writing. If the final sequence feels repetitive, remove an image and compare the rhythm. If your research has no visible effect, run a small technique test and record the result honestly. This approach is more productive than adding content merely to make the portfolio look large.
AQA’s official specification and assessment resources remain the authority for the qualification. Use a past externally set assignment to practise reading and developing a starting point; use the assessment objectives to judge whether your investigation, experiments, records and final response form a coherent whole. Good Photography work is not a hunt for the “right answer” to an old paper. It is a well-evidenced, personally directed sequence of visual decisions.