
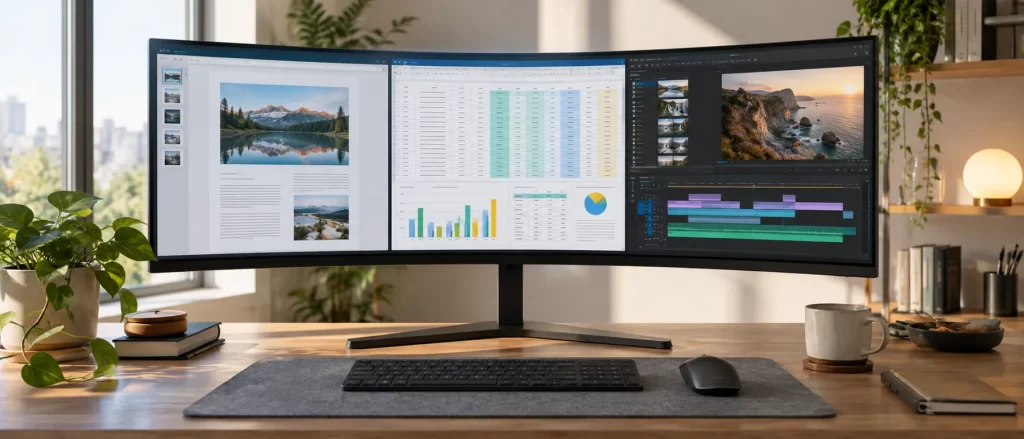
An ultrawide monitor can show two or three useful windows without constant tab switching. First decide what you mean by split screen. If several apps from one computer need to sit side by side, use the operating system’s window-tiling controls or compatible layout software. If two computers must appear on the same physical panel, you need a monitor with picture-by-picture support and appropriate connections. These are different features. Software cannot add hardware PBP to an unsupported display.
This guide covers the quickest Windows and Mac methods, custom zones, dual-input PBP, cables, resolution, practical layouts and troubleshooting. Menu names depend on the operating-system version and monitor model. Check the exact product manual for hardware controls. Most software layouts can be tested on your existing display before you buy anything.

Choose between window tiling, picture-by-picture and picture-in-picture
One computer with several windows is ordinary multitasking. A browser, document, spreadsheet and call window are drawn by the same system. You can arrange them in halves, quarters or custom zones. The monitor receives one video signal and requires no special split-screen hardware. Windows Snap, Mac tiling, PowerToys FancyZones and some monitor companion applications all work this way. They differ mainly in layout flexibility and shortcuts.
Two devices on one panel require picture-by-picture, or PBP. A compatible display can show a work laptop on one side and a desktop computer on the other. The devices remain separate; PBP does not share files, apps or keyboard control. LG’s PBP explanation distinguishes the video feature from software that controls multiple systems. Input pairings and image modes depend on the particular monitor.
Picture-in-picture, or PIP, is a smaller inset from a second source over a main image. It is useful for monitoring another device but is not the same as two equal workspaces. A product listing that says “split screen” may mean tiling software, PBP, PIP or some combination. Ask what the source devices are and which capability the exact model provides. A promotional picture of three desktop windows does not demonstrate dual-input support.
For example, a student putting a lecture beside notes on one laptop needs tiling, not PBP. A designer viewing a managed work computer beside a personal computer needs a supported dual-input mode. A programmer who wants editor, preview and documentation from one workstation may benefit from custom zones. Counting source devices first prevents a mistaken purchase.
Understand width, resolution and readability
Ultrawide is not a single resolution. A 21:9 panel and a much wider 32:9 display offer different horizontal room, and two displays with similar diagonal measurements can have different pixel densities. Window count alone is a poor measure of usefulness. The real question is whether text, menus and controls remain readable at the distance where you sit. If each window becomes too narrow, you gain visible panes but lose usable working space.
Start with two substantial columns. A source on the left and writing space on the right can reduce switching. Give a spreadsheet or drawing canvas a wider portion when it needs many columns or controls. Add a third pane only if it genuinely supports the task. Four equal slices of a moderately wide screen may be worse than two well-proportioned windows. A 50/50 split is a convenient default, not a productivity rule.
Think about vertical space too. Many wide panels add width more dramatically than height. A long document beside another may work well, whereas four sheets may require scrolling in both directions. Full-screen video or a game may have unused side areas because the source does not use the monitor’s aspect ratio. Choose a layout based on what you read and edit, not on a desire to fill every pixel.
Set a sharp supported display resolution, then adjust scaling or text size for comfort. Microsoft’s Windows display guide and Apple’s external-display guide explain these controls. Reducing resolution just to enlarge text can make everything softer; scaling often preserves more detail. Also verify that the computer, dock, cable and selected input support the mode you expect.
Split an ultrawide in Windows with Snap
Windows 11 users should begin with Snap because it requires no additional installation. Open an app, hover over its maximize button or press Windows key plus Z, and choose a predefined layout. Select a region for the active app. Snap Assist then suggests other open windows for the remaining regions. Microsoft’s Snap instructions explain that available layouts can differ with screen dimensions. Look for a layout that gives your main task enough width.
For a quick pair, drag the first window to the left or right edge until the placement preview appears. Release it and choose a companion window. Or focus a window and press Windows key plus Left Arrow or Right Arrow. You can resize a snapped window with the divider. The adjacent window may adapt to the new boundary. This is useful when a browser page needs less width than the document you are writing.
If nothing snaps, go to Windows Settings, System, Multitasking and review Snap windows. Try two standard desktop apps to determine whether the problem is system-wide or limited to one program. Some full-screen games, remote sessions and apps with a large minimum window size will not fit an ordinary Snap region. A stubborn application does not establish that the monitor itself is incompatible.
Windows can help restore groups of snapped apps, but a layout is not a saved copy of your work. Closing apps, reconnecting the monitor or changing resolution can move windows. Save inside each app, then use Snap to rebuild a visual arrangement when necessary. If you frequently move between a laptop screen and an external display, the multiple-display settings can remember window locations based on monitor connection.
Make a layout that serves the task
For research and writing, put the draft beside the source. The draft should display a complete paragraph and the relevant editing controls without excessive wrapping. A narrow PDF page may need less space than the draft. For spreadsheets, reverse the proportions: let the data table occupy the larger area and give the reference page a smaller one. If the table shows only two columns, the division is too aggressive.
For programming, a main editor, preview and documentation can form three columns. Check that code lines and error messages remain readable. Expand the preview regularly to evaluate responsive layouts at known widths; a tiny preview can conceal problems. For meetings, a small stable call window may be enough while you work in a larger document. If you screen-share, share an application window rather than the whole monitor when practical, and check for sensitive notifications.
Some workflows do better with one large central window and a small auxiliary pane. A presenter editing slides may need the canvas wide, while a notes document can be narrow. A student solving problems might prefer the textbook and solution area equally sized. The correct split changes with the task. Use a few minutes of real work as the test rather than judging a layout only by how symmetrical it looks.
Use PowerToys FancyZones for custom Windows regions
If the built-in layouts are too rigid, Microsoft’s free PowerToys includes FancyZones. It defines target zones for application windows on each display. Install PowerToys through an official Microsoft channel, enable FancyZones, then open its layout editor from settings. The documented default editor shortcut uses Windows key, Shift and the grave accent key, although you can change it.
Choose a template or build a grid or canvas. A grid scales proportionally and is useful for three columns. A canvas allows more freely positioned zones. Give the primary application more width than secondary references when that reflects your actual work. A small gap between zones can help distinguish window boundaries, but very large gaps waste the space you bought the display for.
To place a window, drag it while holding Shift by default, then drop it in the highlighted zone. Microsoft’s documentation describes keyboard options, spanning adjacent zones and saving layouts. You can make one arrangement for writing and another for data review. If Windows key plus Arrow suddenly moves between custom zones instead of ordinary Snap positions, check FancyZones’ Override Windows Snap setting. That behavior is a configuration choice, not a broken keyboard.
FancyZones arranges windows from a computer; it does not accept a second computer’s video feed. It also cannot force an app to shrink below its minimum size. If a program overflows a narrow zone, enlarge the zone or choose a different layout. Revisit saved layouts after a resolution or scale change. A layout tuned for one display mode may not remain readable after docking a laptop elsewhere.
Tile windows on a Mac
Mac users can start with built-in desktop tiling. Apple’s window-tiling guide describes moving a window to an edge or corner, using the green window control and choosing arrangements from the Window menu. Place one app on a side and a second beside it. The exact menu choices and keyboard shortcuts depend on the macOS version, so trust the controls visible on your Mac over an outdated screenshot.
Split View is related but different. It places two apps in a full-screen space. Ordinary desktop tiling leaves the windows on the desktop and may suit someone who needs a third floating tool or frequent access to other apps. Apple’s help distinguishes full-screen tiling from desktop halves and quarters. Choose the mode that fits your switching habits, not simply whichever green-button option appears first.
If an app will not tile, check whether it is resizable or already in a special full-screen mode. Try two standard apps to isolate the issue. In System Settings, Displays, verify that the ultrawide is recognized at a useful resolution and scale. If you have more than one screen, arrange their virtual positions so the pointer crosses in the expected direction. A confusing arrangement can feel like a tiling problem even when the windows are behaving correctly.
Older articles sometimes claim Command plus Arrow is a universal Mac snapping shortcut. It is not: inside many apps those keys navigate text or content. Use the current tiling menu and its shown shortcuts. Third-party utilities can add specialized patterns, but review their permissions and support before installing them. Basic tiling does not require a monitor-brand app or special external-screen driver.
Understand optional monitor companion software
Some manufacturers provide tools to arrange windows or adjust monitor settings. LG’s OnScreen Control guidance describes Screen Split. Dell’s Display and Peripheral Manager describes Easy Arrange as well as separate input and PBP controls on supported hardware. Availability varies by monitor model and operating system. Confirm compatibility before assuming a feature shown in a brand’s support article applies to your device.
A companion utility may offer presets, custom arrangements or hotkeys that are more convenient than the operating system’s default. It remains optional for basic Snap or Mac tiling. If it cannot detect the monitor, check the cable path, exact model and manufacturer instructions. Some monitor-control functions rely on a setting such as DDC/CI; Dell notes that Easy Arrange can still work even when other control functions cannot. Do not switch unrelated settings blindly.
Most importantly, software Screen Split is not hardware PBP. The former positions windows inside one source signal. The latter shows two independent video signals. A product page may advertise both, or only one. Look for explicit Picture-by-Picture support and the accepted input combinations in the specific user manual. Several windows in a promotional photograph are not proof that two computers can be displayed together.
Set up picture-by-picture for two devices
Confirm the exact monitor supports PBP. Connect each device to an allowed video input according to its manual. Test that each input displays normally by itself. Open the monitor’s on-screen menu with its buttons or joystick, find PBP or an equivalent multi-view setting, enable it and choose which input appears on each side. Menu names and valid combinations vary. Some displays disable PBP when a conflicting high-refresh or adaptive-sync mode is selected.
After PBP begins, each computer may need a display-setting adjustment. A full-width native resolution is not always the correct mode for one half. Check what the system detects and choose a supported resolution and refresh rate. If text appears stretched, cropped or fuzzy, inspect the source resolution and aspect settings before concluding that PBP is inherently blurry. Some monitors offer different PBP proportions, while others impose an equal split.
Video is only one connection path. A keyboard plugged into the laptop does not automatically control the desktop shown in the other half. Some monitors include a KVM or USB switch, but that is a separate capability. Dell’s documentation lists KVM separately from PBP. Verify the USB upstream wiring and switch method if one keyboard and mouse must serve both systems. Otherwise plan for separate input devices.
Audio is another independent path. A headset attached to the laptop may continue to play that computer’s sound while the other side of PBP shows a desktop. A monitor may let you select only one source for its speakers. The behavior is model-specific. PBP also does not transfer files or clipboard data. Use an authorized network or storage workflow if you need those functions, particularly when one machine is managed by an employer.
Check ports, cables, docks and display modes
A connector that physically fits may still be unable to carry your desired resolution and refresh rate. The result can be a reduced mode, intermittent blanking or no signal. Check the specifications for the monitor port, computer graphics output and any dock or adapter. A laptop USB-C port does not automatically guarantee the video mode or charging capacity you need. An adapter marketed as supporting one 4K mode does not necessarily support every ultrawide format.
For troubleshooting, simplify the connection. Connect one computer directly with a known-good cable, select its input on the monitor and confirm a stable image. Then test the second input. Only after both work alone should you enable PBP. Docks, long cables and multiple adapters add variables. On Windows, use the display Detect option when needed; on Mac, follow Apple’s external-display guidance. Avoid changing three settings at once because then you cannot identify which one mattered.
Label ports and devices. If one PBP half says No Signal, verify that the corresponding device is awake, its cable is seated and the monitor has selected the right input. If one half has different colors or brightness, check the two computers’ individual display and color settings. The images are generated by different systems. Window tiling software will not repair a missing video input or make an unsupported adapter carry more bandwidth.
Layouts for study, writing, coding and analysis
Students can keep a lecture or reading visible beside notes, preserving source titles and page numbers as they work. If a diagram is difficult to read, enlarge the source instead of forcing the notes into an equal half. A third chat window may distract more than it helps. For timed study, choose a stable arrangement in advance so you do not spend the session rearranging windows.
Writers often benefit from a large draft, a smaller source and perhaps an outline. Position the draft where your eyes rest naturally. Keep the original source accessible so quotations and facts can be checked before publication. Seeing two copies of a document is not a backup: save changes in the application. When editing a website, inspect the result at mobile width too. An ultrawide view can hide line-wrapping and spacing problems that readers will experience on phones.
Developers can put an editor beside documentation and a running preview. Give code enough width that indentation and error messages remain legible. Occasionally expand the preview to check different responsive sizes. If a preview runs on a second machine through PBP, remember the monitor does not synchronize project files. Use the project’s actual development and sharing process.
Analysts can view a table and a chart simultaneously, with a small notes area for assumptions. Give more width to whichever object needs more labels. If the table reveals only two columns, a 50/50 split is not serving the analysis. Enlarge charts before presenting them to others. A broad display supports comparison but cannot make tiny chart text acceptable. When screen sharing, hide unrelated or confidential workspaces.
Two-device users should also plan for focus and privacy. PBP keeps video sources separate, but a shared keyboard or screen-sharing session can still send information to the wrong place. Check which system has keyboard focus before entering credentials. Follow workplace rules before enabling any cross-computer KVM or clipboard capability. Visual separation is not the same as information-security separation.
Troubleshoot common split-screen problems
If Windows will not snap, check Snap settings, leave full-screen mode and try a standard resizable application. Inspect FancyZones if it overrides the default arrow shortcuts. If only one program fails, its minimum size or window style may be responsible. Change the layout to fit the app rather than repeatedly dragging it into an impossible region.
If a Mac’s green button acts unexpectedly, distinguish desktop tiling from full-screen Split View. Read the visible options or use the Window menu. If the second app cannot join, test another ordinary app and verify that neither is trapped in a special modal or full-screen state. Follow current Apple instructions for the installed macOS version.
If text is too small, increase scaling or app zoom before lowering the display’s resolution. Sit at a comfortable distance and prefer fewer readable columns. With PBP, adjust each computer individually because each draws its own portion. If text is fuzzy only on one side, inspect that source’s output mode, cable and aspect setting.
If PBP is missing or greyed out, first confirm that the model supports it. Then check the manual for valid input pairs and incompatible modes. Test each device independently. Some products restrict PBP alongside particular refresh-rate, HDR or adaptive-sync options. Those restrictions are model-specific; record your starting settings before experimenting so you can restore the ordinary single-input configuration.
If one half is black, select the correct source, wake that device and reseat the cable. If an image is stretched, inspect resolution and aspect options on the computer and monitor. If windows move after reconnecting, check the operating system’s monitor-identification and window-location settings. Using a consistent dock port can help. A saved software layout and a physical PBP split are separate settings.
What to check before buying an ultrawide for split-screen work
Write down whether your requirement involves one source or two. For one computer, test built-in tiling now and learn the minimum readable width for the apps you use. Compare physical width, native resolution, vertical pixel count and scaling—not just diagonal size. A large panel with insufficient useful pixels may disappoint when several text-heavy apps are open.
For two sources, find PBP in the official manual of the exact model. Check allowed input combinations, the resolution available per side and any refresh-rate, HDR or variable-refresh limits. Verify KVM separately if you need shared keyboard and mouse. If a single USB-C cable should both display and charge a laptop, compare the monitor’s power delivery with the laptop’s requirements.
Consider desk depth, reflections, a suitable stand and comfortable viewing distance. A wider panel may require more head movement if placed too close. Confirm that any monitor arm supports the weight and mounting pattern. If several people use the desk, choose a model whose input and PBP controls are easy to return to normal. Productivity depends on legibility and low friction, not on the number of windows in a promotional image.
For a home-based work setup, our home-based business overview discusses broader planning beyond display choice; the monitor is only one element of a workable workspace. If you are unsure what part of the computer supplies the display signal, the PC basics guide introduces the core components. Use those guides only when the underlying question is relevant; neither is needed to operate Snap.
Use a short trial to evaluate your own setup
Try a real task in the proposed layout for at least one work session. Write down the moments when you still switch windows, squint at text or drag a boundary. Those observations are more informative than a photograph of a perfect desktop. If you repeatedly enlarge the same application, give it the primary region in your saved layout. If a small reference pane is never read, close it and reclaim the width. Change one variable at a time: proportion, scale, seating distance or window count. Otherwise it becomes difficult to tell which adjustment helped.
Test at the beginning and end of a typical day. Daylight and room lighting can change reflections and apparent contrast. A layout comfortable for a short demonstration may be tiring for extended writing or analysis. Ask whether the arrangement supports breaks and focus, not only whether it shows more information at once. If switching between a laptop and an ultrawide frequently, test both connected and disconnected states so windows do not get stranded off-screen. Keep notes about what worked; that makes rebuilding the workspace after a software update far easier.
Finally, remember that a wide panel does not replace good information organization. Name files clearly, keep a small number of relevant windows open, and save work in the application. Split screen is a viewing arrangement, not a backup, a source of extra computing power or a guarantee of productivity. The most effective layout is the simplest one that lets you compare the material needed for your current decision.
A concise setup checklist
For one computer, connect the display, choose a sharp supported mode, and try two windows with built-in Windows or Mac tiling. Add a third pane only if it remains readable. If you need recurring unequal layouts, configure FancyZones or a compatible monitor utility. Save the application work itself, then test the arrangement again after a resolution or scaling change.
For two devices, verify PBP support for your model, test each input separately, enable PBP and assign sources in the monitor menu. Adjust each computer’s display mode if required. Decide how keyboard, mouse and audio will work, and keep the manual’s path back to single-input mode handy. If one side fails, troubleshoot its cable and source independently.
Judge success by readability, reduced switching and fewer mistakes. A simple two-pane layout often beats a crowded four-pane display. Once you know whether you need software window tiling or true dual-input PBP, choosing and maintaining a split-screen ultrawide setup becomes straightforward.