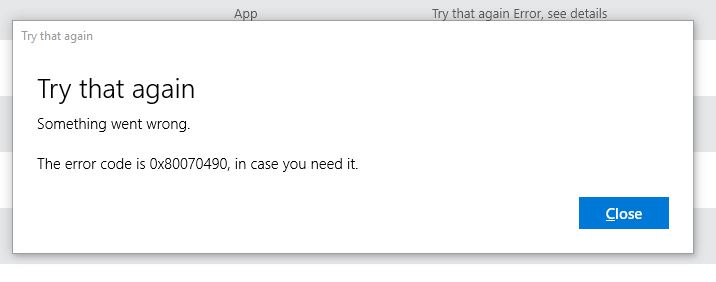
Fix Windows Error Code 0x80070490?
How to Fix Error Code 0x80070490 in Windows 10 Mail App
If you’ve encountered the error “Something went wrong. We couldn’t find your settings. Error code: 0x80070490” while using the Mail app on Windows 10, don’t worry! This guide will help you understand the problem and show you simple steps to fix it.
What Is Error Code 0x80070490?
The Error Code 0x80070490 happens when your computer has a corrupt system file. These files are part of the Component-Based Servicing (CBS), which controls how Windows operates. If these files are damaged, apps like Mail may stop working properly.
Why Does Error Code 0x80070490 Happen?
Here are some common reasons:
- Corrupt System Files: A corrupt CBS or registry file can cause the error.
- Antivirus Issues: Some third-party antivirus programs interfere with the Mail app.
- Failed Updates: An incomplete or faulty Windows update can lead to this error.
- Malware: Harmful software can damage Windows system files.
- Disabled Files: If essential Windows files are disabled manually, the error can appear.
How to Fix Error Code 0x80070490
1. Create a New Local Account
- Open Settings and go to Accounts > Family & Other Users.
- Click Add someone else to this PC and create a local account.
- Transfer your files to the new account.
- Make this account your primary account and delete the old one.
2. Use a System Repair Tool
- Download a trusted system repair tool from its official website.
- Install and run the tool to scan your computer.
- Click Start Repair to fix any issues.
- Restart your computer and check if the error is gone.
3. Run the Windows Update Troubleshooter
- Go to Settings > Update & Security > Troubleshoot.
- Select Windows Update and click Run the Troubleshooter.
- Follow the on-screen instructions to fix the problem.
- Restart your computer to see if it works.
4. Perform an SFC Scan
- In the search bar, type cmd and run Command Prompt as Administrator.
- Type
sfc /scannowand press Enter. - Wait for the scan to complete.
- Restart your computer to apply the fixes.
5. Run DISM Tool
- Open Command Prompt as Administrator.
- Type
DISM /Online /Cleanup-Image /RestoreHealthand press Enter. - If the process doesn’t start, insert your Windows installation media and type:
DISM /Online /Cleanup-Image /RestoreHealth /Source:C:\RepairSource\Windows /LimitAccess - Press Enter and wait for the process to finish.
6. Check for Malware
- Use your antivirus program to run a full system scan.
- Remove or repair any harmful files found during the scan.
- Restart your computer.
7. Disable Your Antivirus Temporarily
- If no malware is found and the error persists, try disabling your antivirus software temporarily.
- Be cautious, as this may expose your system to risks.
8. Clear the Registry Cache
- Press Windows + R to open the Run dialog box.
- Type
regeditand press Enter. - Navigate to:
HKEY_LOCAL_MACHINE\SOFTWARE\Microsoft\Windows\CurrentVersion\Appx\AppxAllUserStore - Delete any keys with long alphanumeric names (e.g.,
S-1-5-21-...). - Close the Registry Editor and restart your PC.
9. Check System Services
- Press Windows + R and type
services.msc. - Look for these services:
- BITS (Background Intelligent Transfer Service)
- Cryptographic Service
- Windows Update
- Ensure they are running. If not, right-click the service and select Start.
10. Delete the SoftwareDistribution Folder
- Press Windows + R and type
services.msc. - Disable Windows Update under Services.
- Navigate to
C:\Windows\SoftwareDistributionand delete the folder (or rename it toSoftwareDistribution.OLD). - Restart your computer and re-enable Windows Update in Services.
Quick Tips for Success
- Always restart your computer after applying fixes.
- Keep Windows and your apps updated regularly.
- Use trusted repair tools and avoid unverified third-party apps.
Conclusion
The Error Code 0x80070490 can be frustrating, but it’s usually easy to fix by following these steps. Whether you create a new account, run troubleshooting tools, or clear system cache, one of these solutions will likely resolve the issue.


